How to Unclog a Garbage Disposal

Garbage disposals are one of the most convenient kitchen appliances, but when something goes wrong, it can feel like a disaster. When your kitchen sink goes down, your whole kitchen goes down. Luckily, it’s easy to unclog a garbage disposal. Understanding the cause of the problem and knowing how to fix it will save you time and stress. In this post, we’ll walk through how to unclog a garbage disposal, tips to prevent future issues, and what to do if DIY fixes don’t work.
Your Garbage Disposal Probably Doesn’t Need to Be Unclogged
First, let’s clear up a common misconception: garbage disposals themselves rarely clog. You probably don’t need to unclog your garbage disposal. More often, the problem lies in the kitchen sink drain line. If your kitchen sink is backing up, the culprit is likely a clogged drain line, not the disposal.
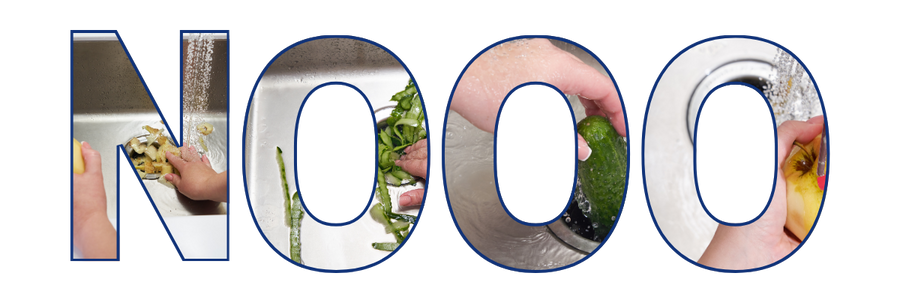
There’s a long list of things you shouldn’t put down your disposal. In fact, it’s faster to list what you should put down your disposal: Not much. Scrape your plates before rinsing them, and put your food scraps from meal preparation in the trash, not the disposal.
The biggest culprits for causing kitchen drain line clogs are fats, oils, grease, and large food particles making their way down the sink. These materials can stick to the inside of the pipes, leading to slow drainage or complete blockages. Other big no nos for the kitchen sink drain are coffee grounds and carbohydrates like pasta and rice.
Is It a Clogged Sink Drain or a Jammed Garbage Disposal?
It’s important to figure out whether the problem is with the drain line or the garbage disposal itself. If water is backing up into the sink but the disposal seems to be running fine, it’s likely the drain line that’s clogged. This often happens when fats, oils, grease, or debris build up in the pipes, causing a blockage that prevents water from draining properly.
On the other hand, if the garbage disposal makes a humming sound but isn’t grinding food, it’s probably jammed. This happens when the blades are unable to move, often because of obstructions or debris inside the unit. Differentiating between these two issues can help you determine the right solution and avoid unnecessary repairs.
Why Garbage Disposal Blades Get Jammed
Garbage disposal blades can jam for several reasons, and one of the most common is attempting to grind large or tough items. Hard objects like bones, fruit pits, or even fibrous vegetables such as celery can prevent the blades from turning properly. These materials are difficult for the disposal to handle and often cause blockages.
Another common reason for jams is that non-food items accidentally fall into the disposal. Utensils, bottle caps, or other small objects can end up in the disposal and block the blades from moving. Always check for foreign objects before running the disposal to avoid unnecessary damage.
Lastly, buildup over time can lead to jams. Even small particles can collect in the disposal and create a sticky residue, making it harder for the blades to rotate. Regular maintenance and cleaning can help prevent these types of issues from occurring.
How to Unclog a Garbage Disposal
If your garbage disposal is just jammed, that’s good news! Unjamming and resetting a garbage disposal is a quick and easy home repair you can do yourself. Here’s a step-by-step guide to unjamming your garbage disposal safely and effectively:
- Safety First: Turn off the power to the garbage disposal at the wall switch or circuit breaker to avoid accidents. Never put your hand inside the disposal.
- Inspect the Disposal: Use a flashlight to look inside the disposal for visible obstructions. Remove any jammed items using tongs or pliers.
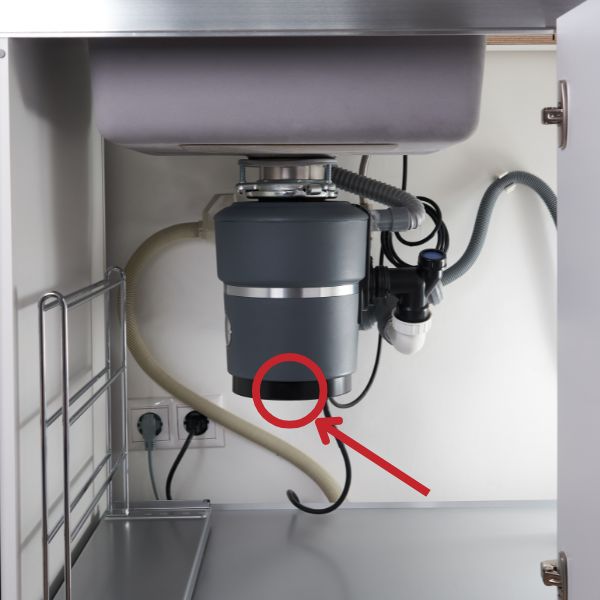
- Manually Free the Blades: Locate the hex-shaped hole on the bottom of the disposal unit. Insert an Allen wrench (typically included with the disposal) into the hole. Turn the wrench back and forth to manually rotate and free the blades.
- Reset the Disposal: Press the red reset button located underneath the unit. Restore power and test the disposal by running cold water while turning it on.
What If That Doesn’t Fix the Problem?
If the unit doesn’t hum or reset, the motor may be burned out. When the blades are jammed but the unit continues to try to turn, the motor can burn out. If this is the case, you will need a new garbage disposal. If you are particularly handy, you may be able to replace it yourself, but most people leave this work to the professionals. A plumber’s years of experience make a garbage disposal replacement look easy. A plumber will have the disposal, the tools, and the knowledge to change out your garbage disposal quickly and professionally.
If the sink is still backed up, there could be a deeper issue. The clog may be in the pipes leading away from the sink. Unclogging a kitchen sink can be more complicated than unjamming a garbage disposal. There are a few steps you can try before calling the plumber to clear a kitchen sink drain.
How to Clear a Kitchen Sink Drain
If you’ve unjammed your garbage disposal and your kitchen sink is still backing up, you likely need to unclog the drain line. Clearing a kitchen sink drain might seem like a big job, but it can often be resolved with simple tools and techniques. Here are some options for how to do it:
- Use a Plunger
Start with a plunger, which is one of the most effective tools for unclogging a sink. Begin by filling the sink with a few inches of water to create a seal. Place the plunger firmly over the drain and pump it up and down several times with force. After a few attempts, check to see if the water starts draining. If successful, flush the drain with hot water to ensure the clog has been fully cleared. - Don’t Waste Time Trying Baking Soda and Vinegar
A quick Google search will recommend baking soda and vinegar to unclog a kitchen sink. While this is a great cleaning solution, it’s not going to clear your kitchen sink. It could make a thick paste to add to the mess. - Remove and Clean the P-Trap
If none of these methods work, the next step is to check the P-trap, which is the curved section of pipe beneath your sink. Place a bucket underneath the P-trap to catch any water or debris, then use a wrench to loosen the slip nuts and remove the pipe. Clean out any debris inside the P-trap, rinse it thoroughly, and reattach it securely before testing the drain again.
This approach will solve a clog if it’s within the p-trap, but not if it’s beyond the trap. If you’re handy, this is a good step to take in order to determine how deep the clog is in your line. - Use a Snake
If the clog is deeper in the pipes, you may need to use a drain snake, also known as an auger. At this point, you may want to call a plumber. When you start taking apart pipes and running augers, you begin risking leaks or causing damage. Little hand augers aren’t effective on large or deep clogs. They generally aren’t strong enough or large enough to clear significant blockages. They also aren’t very long, so if the clog is farther down your pipe, they won’t be able to reach it. But if you feel you’ve come this far, and aren’t ready for a plumber yet, read on!
Insert the snake into the drain and turn its handle to push it further into the pipe. When you encounter resistance, it means the snake has reached the clog. Rotate the snake to break up the blockage or pull it out, then flush the drain with hot water to ensure the pipe is clear.
If your drain line is full of grease, this auger will, at best, poke a small hole in the clog. While this may give you momentary relief, it likely will not solve your problem for the long term. Grease really is a problem for the professionals. - Call a Plumber
If the clog persists or you’re unsure about handling the issue yourself, calling a plumber is the best course of action. A professional can use specialized tools to clear even the most stubborn clogs quickly and safely. With these methods, you can often resolve sink drain clogs without unnecessary hassle or expense.
How to Avoid Needing to Unclog a Garbage Disposal in the Future

To keep your garbage disposal and drain line running smoothly, it’s important to watch what you put down the disposal. Avoid fats, oils, grease (FOG), bones, large food scraps, and fibrous vegetables like celery or potato peels. These items can build up in the pipes or jam the disposal.
Garbage disposals are designed to handle small, incidental food scraps, not full platefuls of leftovers. Always scrape plates into the trash before rinsing them in the sink. This practice minimizes the amount of food waste entering your disposal and reduces the likelihood of clogs or jams.
Regularly run hot water down the drain after using the disposal. Hot water helps flush out small food particles and prevents grease or oils from solidifying in the pipes. Periodically fill your kitchen sink with hot water, and then open the drain while running the garbage disposal. You can also occasionally grind ice in your garbage disposal to help keep it clean.
Constant Clogs May Mean You Should Replace Your Garbage Disposal
Maybe it’s not you. If you’re constantly looking up how to unclog a garbage disposal, you should make sure your garbage disposal is from a reputable brand and up for the challenges you’re throwing at it. A well-built disposal from a trusted brand like InSinkErator is designed to grind food waste more effectively and is far less likely to jam. Just as important, your disposal needs enough horsepower to keep up with your kitchen. Smaller units can struggle with everyday use, while a more powerful motor handles the job with ease. If your disposal feels underpowered or clogs often, upgrading to a stronger, reputable model can save you a lot of frustration.
Aaron Plumbing – Same Day Garbage Disposal Help
If your searches for how to unclog a garbage disposal haven’t gotten things flowing for you yet, it may be time to call a plumber. Our team fixes garbage disposals every day, and we keep them on our truck if you need a new one. We’ll diagnose your disposal, suggest a repair or replacement, and with your approval, we’ll fix or replace right then. You’ve got better things to do than deal with a clogged disposal. You focus on the fun, we’ll focus on the fix.

